These are other projects I completed in ME 318: Computer-Aided Product Creation.
Medallion

Our assignment was to engrave a medallion with an image using handwritten G-code. I wanted to engrave something that I felt represented myself. I have a deep love for cheeseburgers and it is a food that also represents my hometown of Los Angeles, CA. Several major burger chains started in the LA area because of its car culture and history of drive-ins and fast food. I wanted to represent my favorite food group on my medallion.
I first sketched some drawings by hand that I thought would be feasible to convert into G-code. After I had a design I liked, I recreated the design in SolidWorks using only arcs and straight lines.


In order to engrave the disk, I attached it to a fixture plate using double stick machining tape. I used a single lip cutter to engrave my burger design with a depth of cut of 0.01″. The fixture plate was mounted in a vise and air was used as a coolant for the cut. I engraved the Product Realization Lab’s logo on one side, flipped it over, and engraved my burger on the other side.
I like how my burger turned out, particularly the sesame seeds on the bun. This project was a good introduction to both the CNC mills and G-code and it took considerable checking and double-checking to ensure I had all of the right settings.

PRL Logo on Reverse Side
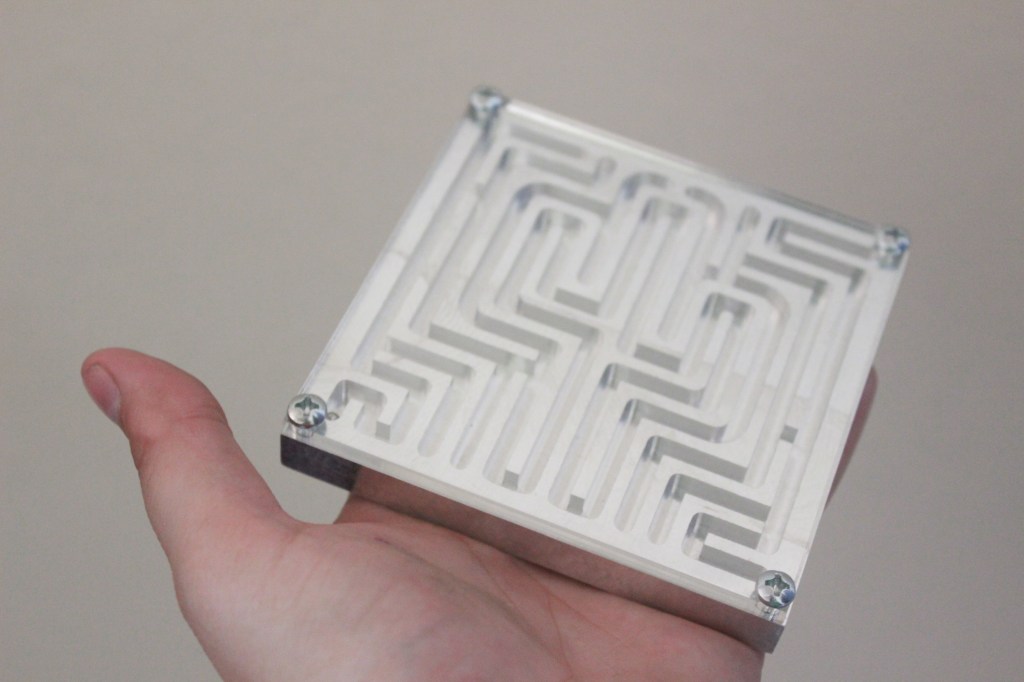
Maze
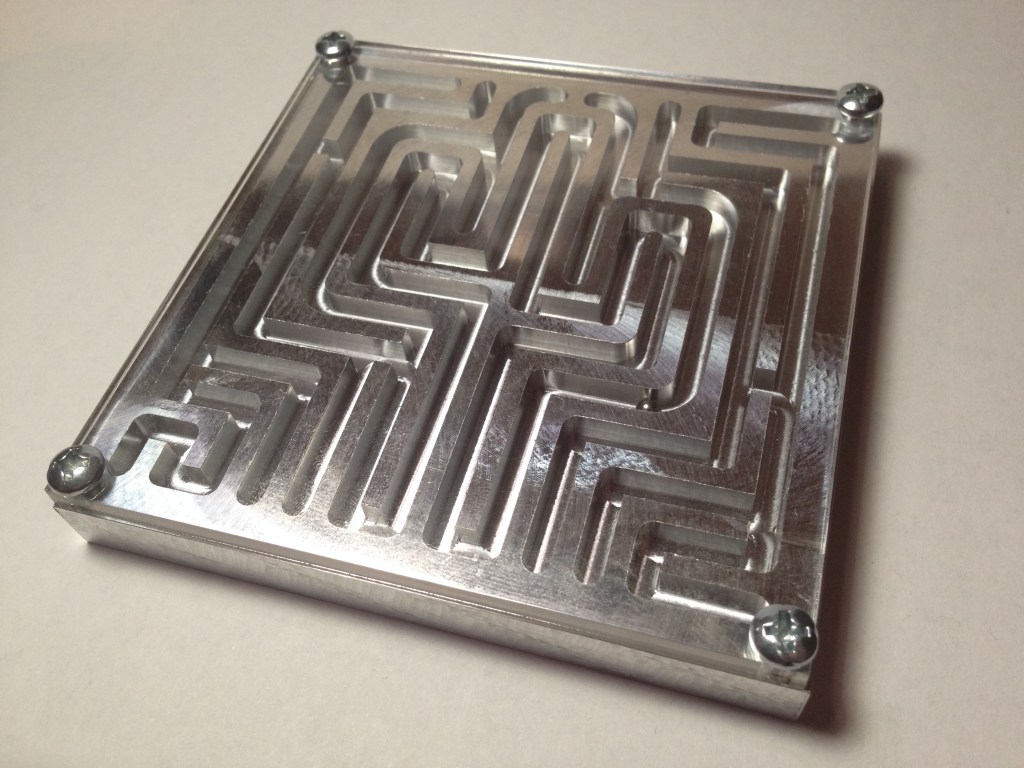
We needed to create a ball maze from a block of aluminum. I wanted to create a maze that evoked a pattern but would still just be a linear ball maze. I settled on a cactus as a recognizable outline and created paths around the familiar saguaro silhouette and connected parts of those paths to create the maze. I ensured that the paths would be wide enough for the ball bearing and designed the extruded cuts in SolidWorks. I then used HSMWorks to create the toolpaths to cut the maze.
To cut the maze, I used a face mill and a 1/8″ end mill. I fixtured the block in a vise, faced off 0.005″ from the top, and used the end mill to cut the maze paths. I also formed screw threads in the four corners of the maze so I could attach some clear acrylic to prevent the ball from escaping. I laser cut the acrylic sheet and fastened it to the aluminum using screws.

Probing the Stock Aluminum
This project taught me how to use HSMWorks to create my toolpaths, and it certainly taught me to pay attention to machining time. This was the first long cut I did and it was more involved than the medallion. I learned to pay attention in the air pass to make sure the tools were at the right heights and that the coolant was on.
Bottle Opener
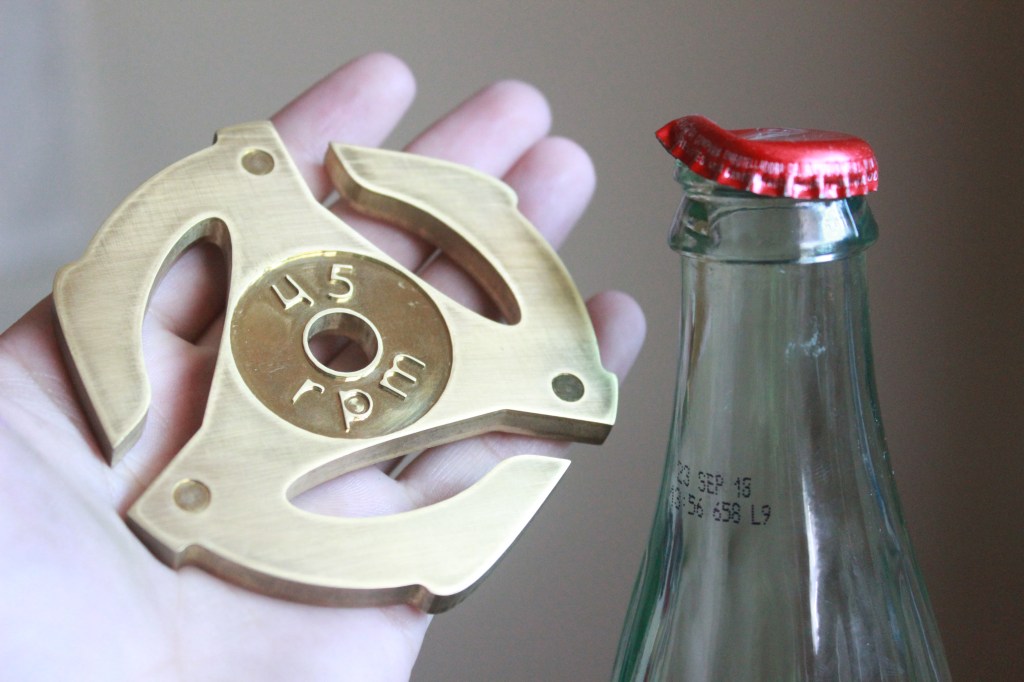
The goal of this assignment was to create a bottle opener that pays homage to Nobel Laureate Bob Dylan. While I was personally unfamiliar with much of Bob Dylan’s work, I decided to focus my design on the 60’s counterculture that Dylan helped to shape with his music. I wanted a design that would be instantly recognizable to that generation that would also represent the world of music. I decided on a 45 RPM adapter for vinyl records for its distinguishable outline and its ease to convert the geometry into a bottle opener. The choice of design also helps to drive home that “The Times They Are a-Changin’” since most younger people have no need for these once-useful adapters.
I had initially planned to have the center of the adapter be a twist-off bottle opener, but I found through prototyping with some laser cut Duron that the hole would need to go fully through the part and the resulting wall thickness would then be quite thin. I decided to swap out the center opener with lettering to make the opener more like a larger version of an adapter. I also included markings on each arm to mimic the look of injection molded plastic.
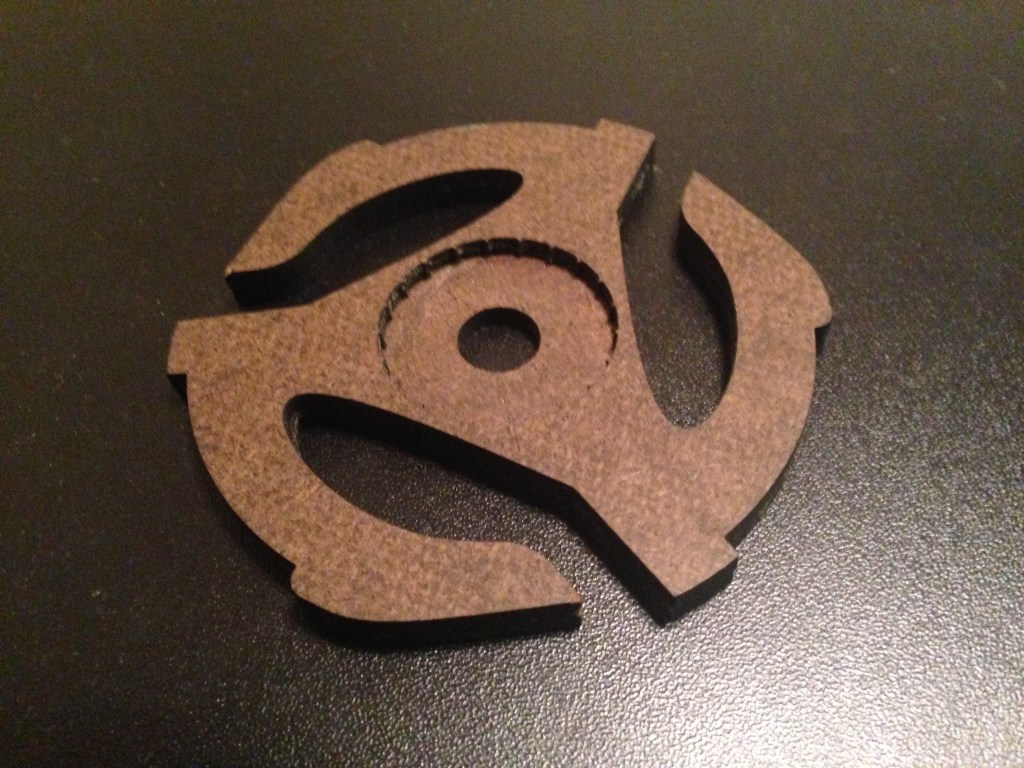
Duron Prototype
I used a face mill, a 1/8″ end mill, and a 1/16″ end mill to cut my bottle opener. I was able to find a machined block of brass that I thought would work well for the cut and mounted it in a vise. The bottle opener itself was held to the stock using tabs that I was able to saw off later. The face mill removed 0.005″ from the top, and my 1/8″ end mill did the majority of the machining. I used a 1/16″ end mill for most of the lettering as well as cutting regions the 1/8″ could not reach.

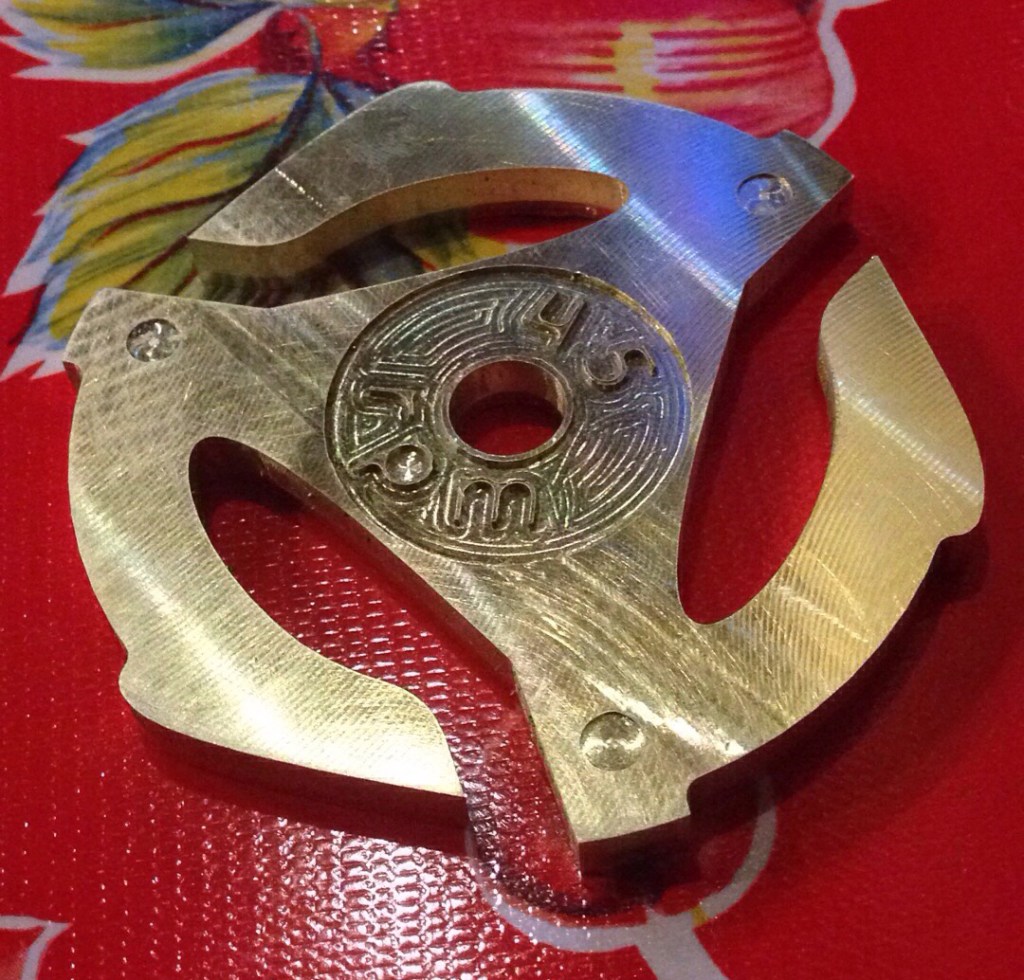
I learned that it is always good to prototype parts to ensure that they performed their desired functions. I was glad that I had laser cut my outline beforehand to ensure that it would fit onto a bottle and that there was enough space to grip the cap. This project also taught me how difficult it is to get lettering to look good, especially when multiple tools are involved. If one of the tool diameters is not entered properly into HSMWorks, there will be some cusps that aren’t machined. While the cusps left on my project are fairly small, it was good to learn that it is probably best to use only one tool while lettering. Lastly, I learned that brass is heavy. It machined beautifully, but it is way denser than aluminum.
