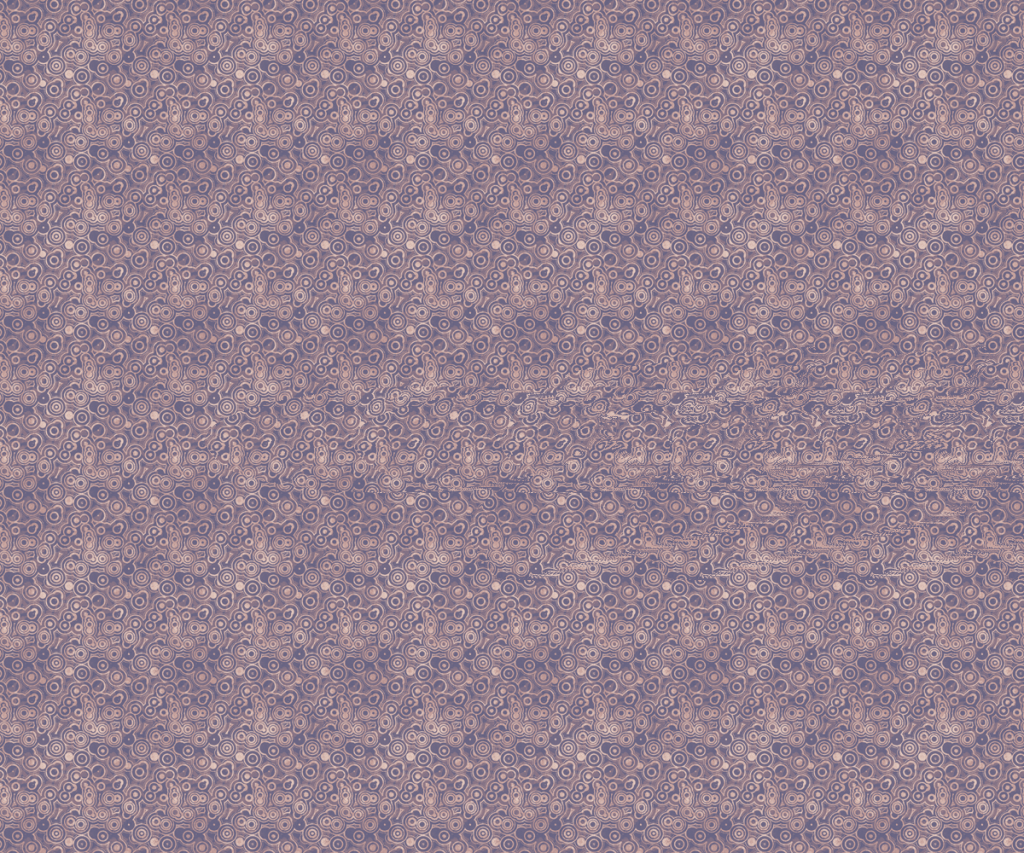


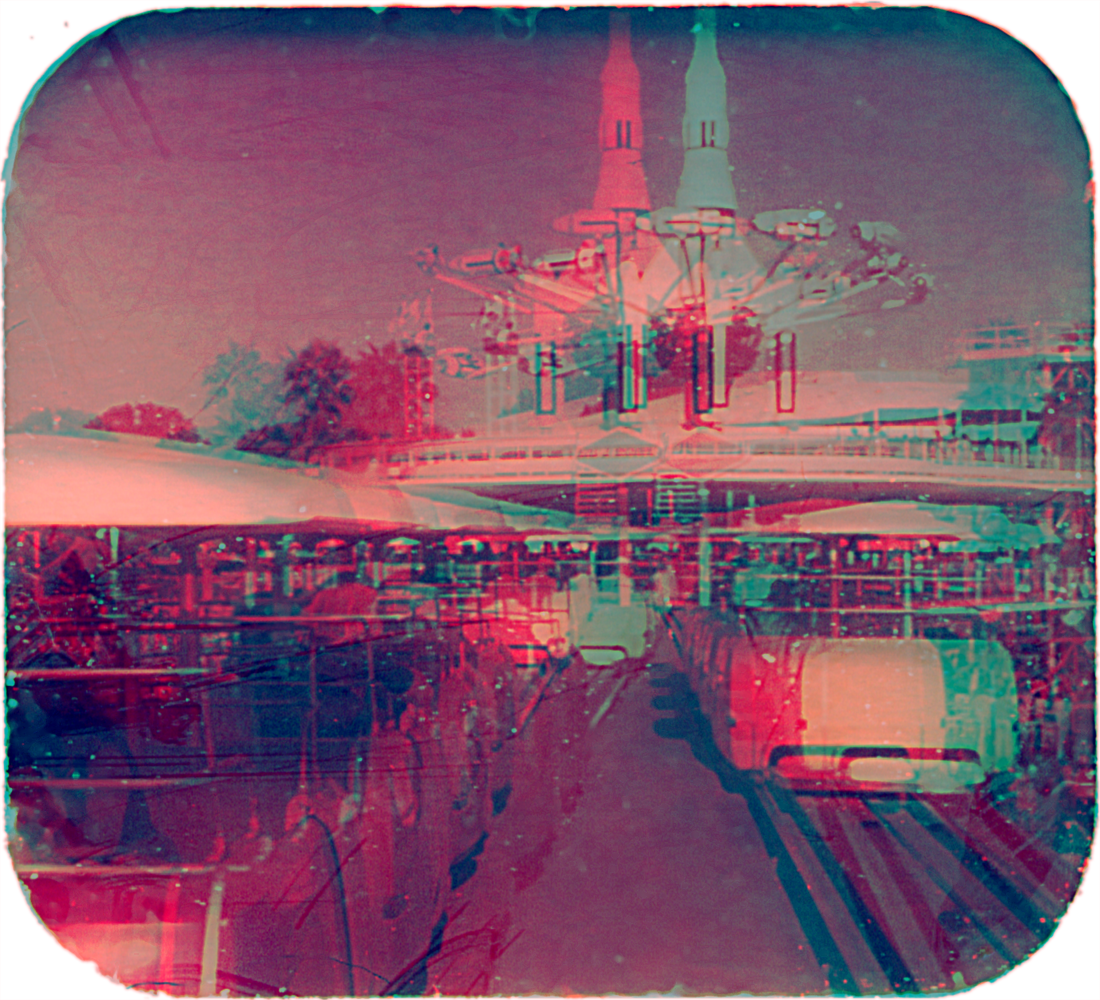
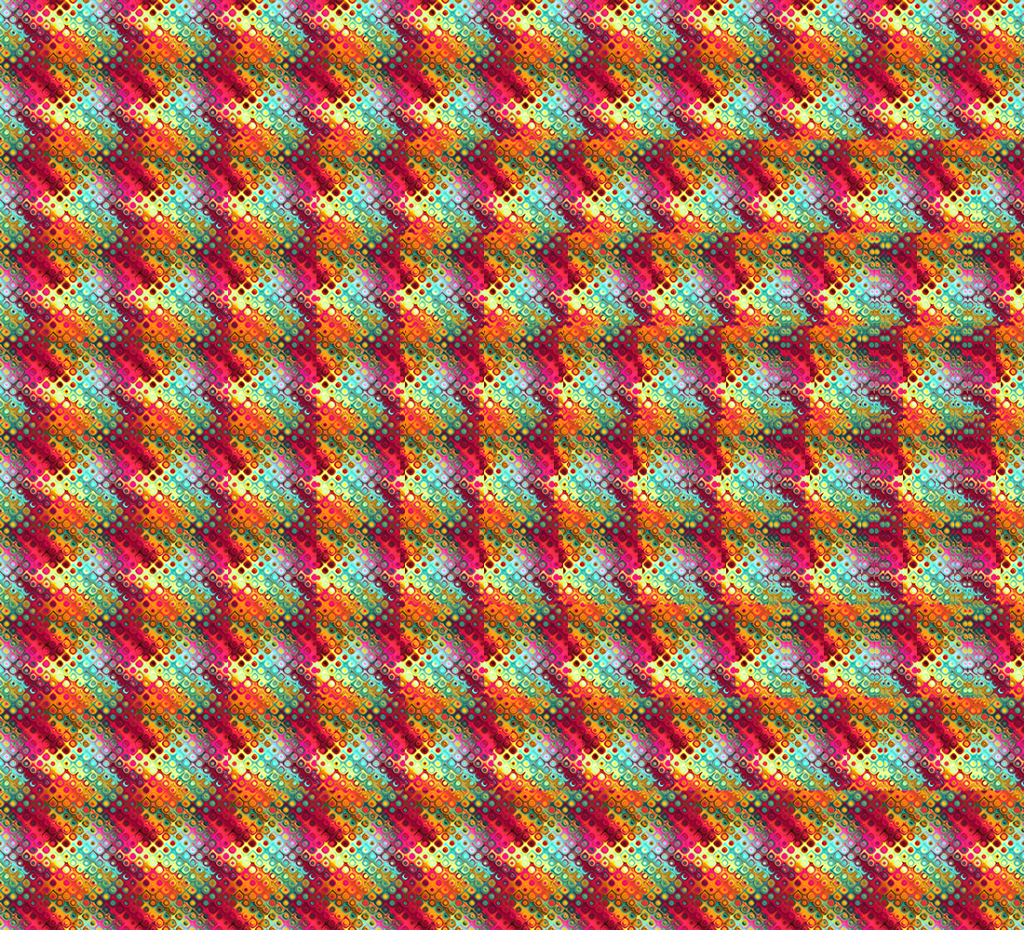
These are some stereograms I have made using a seamless pattern, a depth map, and a MATLAB script I wrote. You can click on the images to enlarge them and try the illusion out for yourself. The trick is to focus your eyes past the screen and look into each image. Solutions are in the alt text. Below is an explanation on how these work and how to make your own.
How Stereograms Work
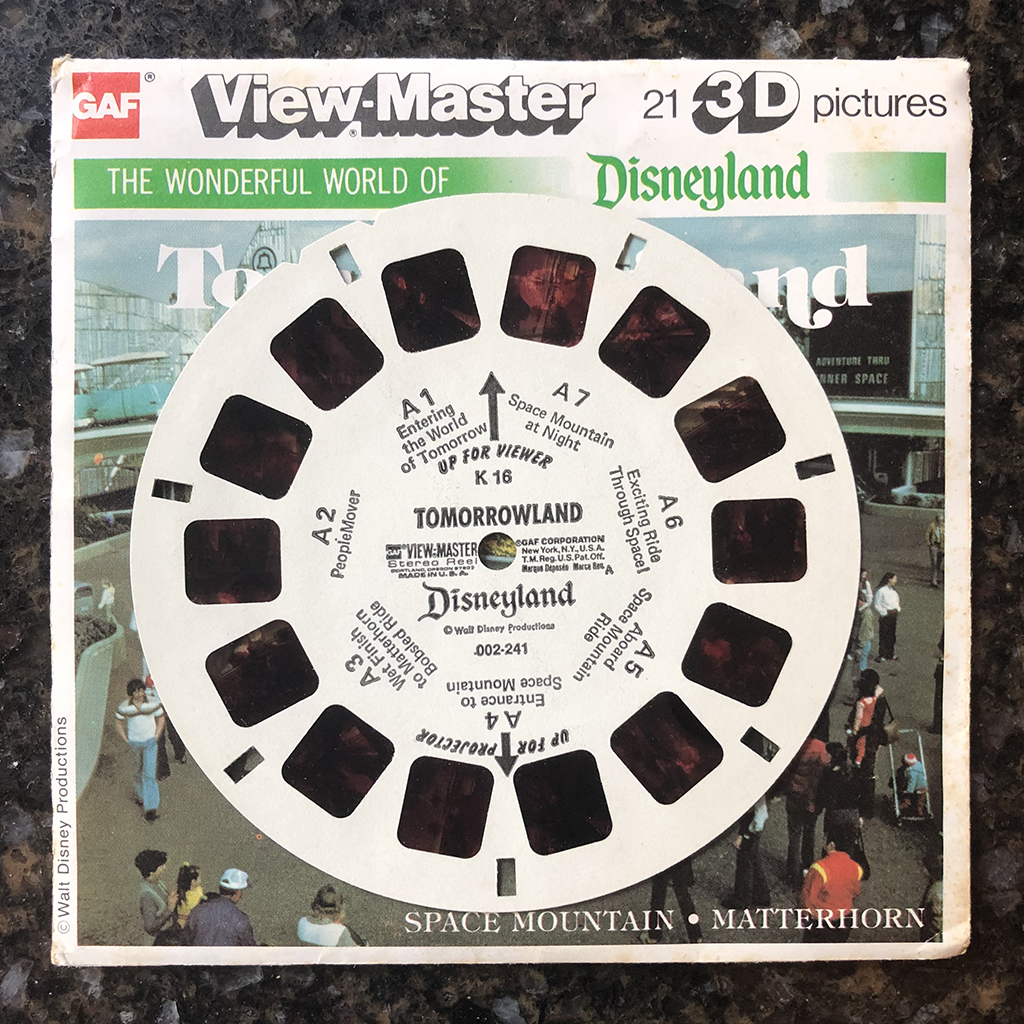
Your brain normally perceives depth by comparing the images each eye receives and calculating depth based on how the objects shift. This stereo vision can be simulated in many ways, sometimes using glasses or viewers. Stereoscopes and View-Masters, their modern equivalent, focus each eye on separate images that were taken a short distance apart, and the brain merges them into a single, 3D image. Red-cyan 3D images (also called anaglyph 3D) work in a similar fashion, where the colored lenses filter incoming light so the eyes see different images.


Stereograms are a little different in that your brain is merging pattern repetitions instead of two slightly different images. They work by varying the distance between repeated instances of a pattern. When you look at a stereogram and see the hidden image, each eye is actually focusing on adjacent instances of the pattern and merging them into one, as if you were viewing just one pattern.
The pattern in a stereogram will repeat after a certain distance, which the brain perceives as a baseline distance. Generally speaking, if the repetition happens sooner (i.e. after a shorter distance), this looks closer to the viewer than the baseline. If the pattern repeats longer than baseline, that section looks farther away. Note that this pattern alteration is only useful in the horizontal direction since that is in line with our eyes.
As an example, try viewing the image below as a stereogram. The squares repeat after 100 pixels in the first two rows, establishing our baseline pattern. However, the third row repeats every 90 pixels, so those squares look closer, and the fifth row repeats after 110 pixels, so that row appears to be going into the plane.

If we fill in a pattern between the squares, the effect remains the same. Instead of copying over a single square, we copy the entire pattern and shift the pattern itself over accordingly.
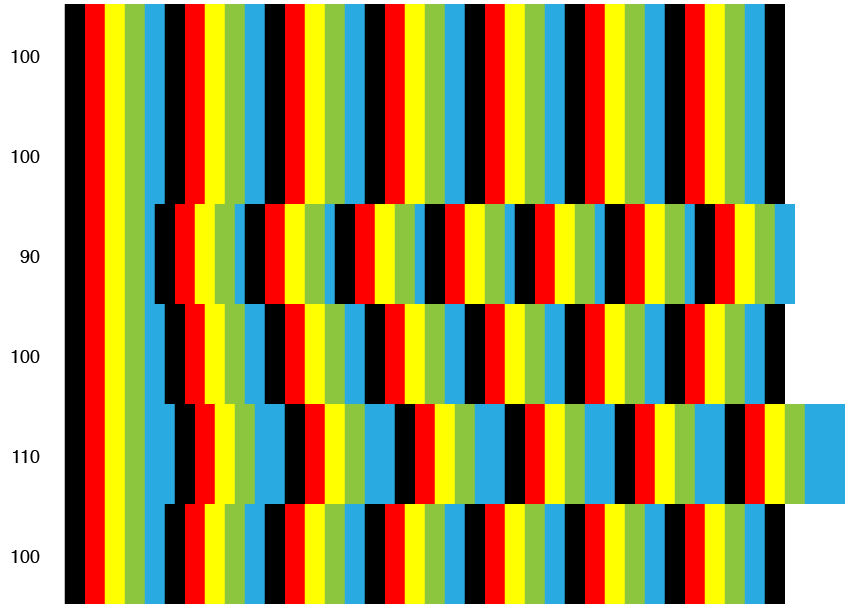
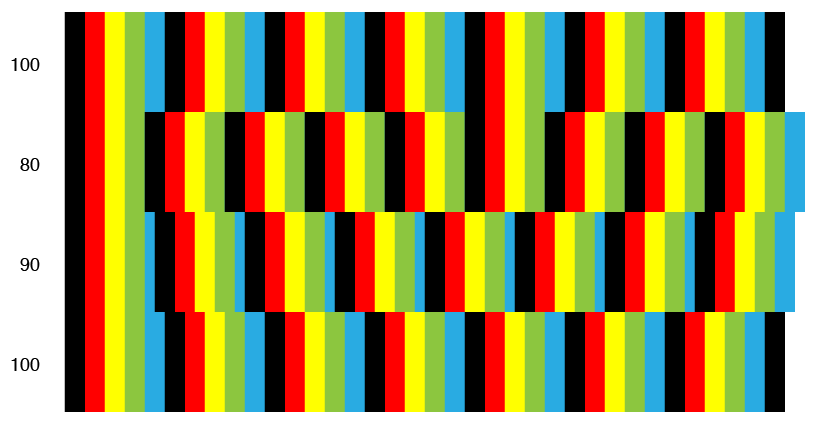
Additionally, changes in the distance between repetitions gives the illusion of different depth layers. A row that repeats every 80 pixels looks closer than the one that repeats every 90.
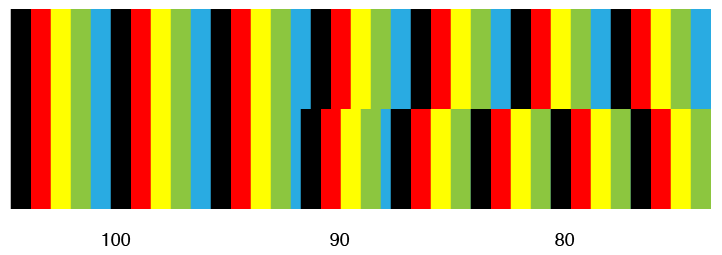
We can also change the depth along an individual row by varying the length of the pattern repeats just within the row. Part of the pattern below repeats every 100 pixels, part 90 pixels, and part 80 pixels. The result looks like stairs popping out towards the viewer.
That was a rather long-winded introduction on some of the intricacies of stereograms, but it will serve as the basis for how we can use a depth map to create a stereogram.
Making Your Own Stereogram
What you need:
- Pattern to repeat. This works better with a seamless pattern so the image edges don’t interfere with the illusion.
- Depth map. See the tutorial on my 3D engraving page for making your own depth maps.
- Some coding knowledge and the ability to edit individual pixels on an image. I used MATLAB, but this can be done in a different language. Alternatively, you can use an online generator.
The depth map will indicate how to shift over our pattern, which alters the distance between pattern repeats. The basic algorithm is as follows:
Tile your pattern on a new image the size of your depth map;
For each row:
	Sample the pixel value on the new image;
	Sample the pixel value on the depth map;
	Paste the image’s pixel value at the location [current location + pattern width – depth map value];
	Move to the next pixel in the row;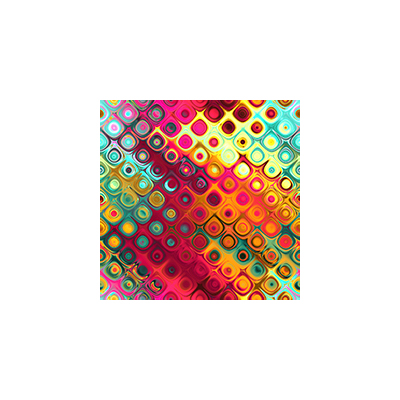

In practice, say you have a pattern that is 100px × 100px and a depth map as shown (the numbers indicate the value of each section and are not part of the map itself). The code scans along each row pasting the next horizontal copy of the pattern. However, this new pattern copy is altered based on the depth map. If the depth map value is 0, the current pixel gets copied and pasted 100 pixels down the row, which does not change the pattern. If the map value is 20, then the pixel gets copied 80 pixels away. A larger map value means the code copies the pixel closer to the current location, essentially truncating the pattern and repeating it sooner than expected. Like the examples shown before, this will appear to pop out of the plane because the pattern is now shorter. The code then continues to alter the repeated pattern in accordance with the depth map.
There are some other things to keep in mind with stereograms, such as aesthetics and legibility. Too many drastic changes in depth map height along a single row can distort the pattern too much, making the 3D hard to read. This is important to keep in mind if the depth map includes any text. If the pattern becomes hard to merge, try changing the maximum values on the depth map so the pixel shift is less severe.
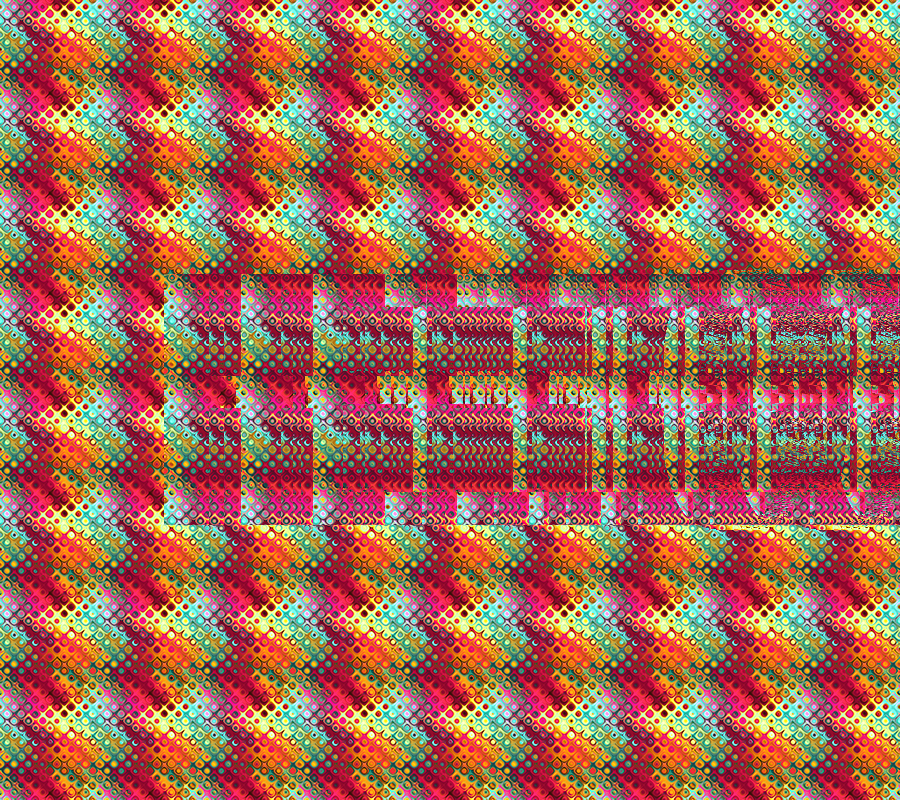

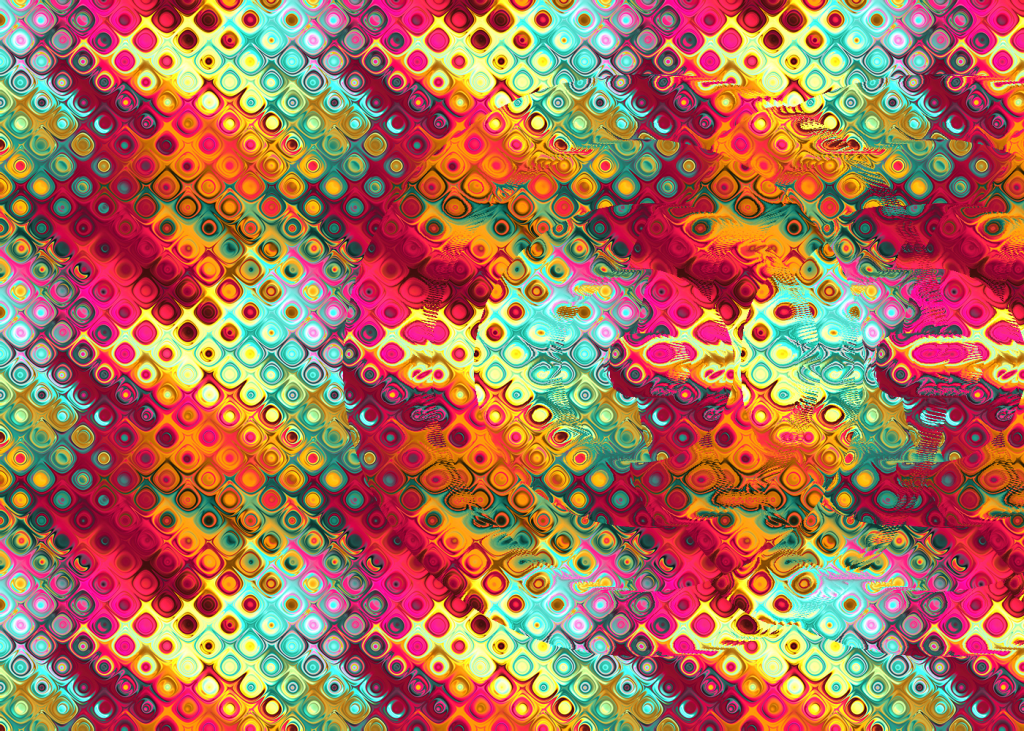
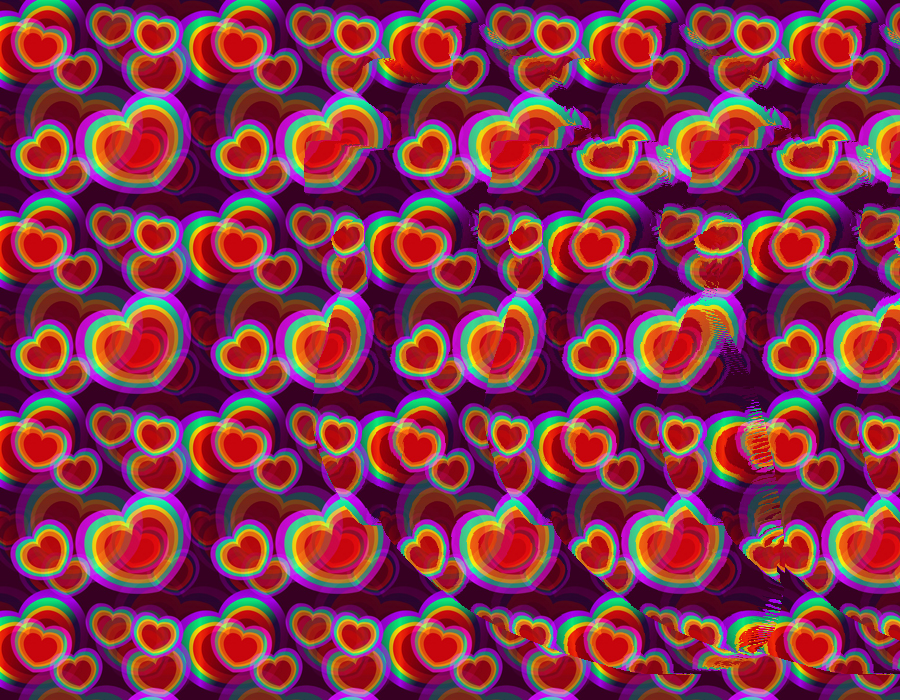
Some patterns might also look better with certain stereograms, so it is good to try out several to find one that works. The examples below all use the same depth map and maximum pattern shift, but the patterns affect the legibility of the illusion (click to enlarge).